Tuesday, March 18, 2014

Sailor Crown

My oh-so eventful Spring Break began a few days ago, and while all the cool kids are out vacationing, hanging out with friends, and being totally normal...I'm stuck in a rut with nothing to do but watch Netflix and nap.

However, today I decided to officially kick in the spring season (and escape from boredom) with the ultimate symbol of all things in bloom:

A FLORAL CROWN.

I stopped by my trusty Michael's Arts and Crafts, picked up the required materials (which honestly isn't a lot to make a crown of flowers), and got down to business. With the help of this D.I.Y Floral Crown Video, I finished the project in three to four hours (which is small to the amount of time I thought my clumsy self could accomplish). The video helped me out a lot, and was very detailed to what I needed, how to proceed, and the process of putting on the flowers.


All you need to master the Floral Crown is: 

1. Scissors
2. Packaging Tape
3. Pliers
4. Wire Cutting Shears
5.Green Floral Wire
6.Fake Flowers of your liking

My table was filled to the brim with petal beads, chipped wire, and debris by the time I was done. I decided to go with complementary colors that went with Teal for purposes you shall soon see. Yet, here's a picture line up of my Floral Crown process:


The final result is beyond what I thought, and even though it was time consuming, I'm so proud of my custom floral crown! Here's the final result with a lil' modeling action (p.s. I had a little too much fun with my photo editing app):


"You look like Sailor Moon"

My mom told me after I modeled with my teal colored wig and floral crown. I think she was trying to insult me, but I only found it encouraging and a compliment since I love Sailor Moon and what she represents as a strong female anime character. 

I chose the flowers based off of the color of my wig, and found the colors so complementing to each other, and the crown is comfortable on my head without my wig also. I think this piece is going to be a major statement for me this season...even if I have no clue where I'll wear it next. Alas, that's honestly the best part! I can't wait to show off my new head piece!

Be sure to make your own Floral Crown with the help of the video provided. And remember kids...

I'm Sailor Razz, and on behalf of the Flower Crown, I shall vanquish all evil!


Xoxo, Razz the Sailor Scout

Thursday, March 6, 2014

Snazzy Sticks

Inspiration slapped me in the face the other day when I tumbled on tumblr, but it came in the form of a quirky, retro sticker covered clutch on my dashboard. I couldn't stop marveling at the uncanny gem, and then I decided to do the worst thing possible.

Taking my hard earned work money and spending it at my job, buying crafts to mold the perfect snazzy sticker covered clutch on a budget.


$2 Canvas Clutch, turns into this with a bit of painting and gluing:


I'm so pleased with the final result, and I can't wait to sashay around when it gets warm with this lil number in my hand. It also reminds me of the inspirational photos I tumbled on my dashboard:


Can you even tell which dazzling sassy handcrafted clutch is mine?


(Professional photos from Google Images)

Love, Razz the Craft Clutcher 

Saturday, February 15, 2014

A Little Wine & Dine

Yesterday, in my daze of not having a valentine for Single's Awareness Day, I decided to pool my loneliness into making dinner for my parents. Ain't I sweet? Yea, I thought so too until I noticed my efforts to make my family a "simple," dinner turned into me conjuring all types of comfort food in my mind. However, I settled on a filling, cheesy, and savory meal that me and my parents could agree on.

Homemade Carmelized French Onion Soup.

I've made French Onion Soup before, but as soon as I got myself into the kitchen and chopped away at the onions, I noticed why I haven't made French Onion in a bit. The sting of onion stench kills my eyes! Yet, as soon as I had the marvelous meeting of tantalizing cheese, soft savory onion, and soup soaked bread into my mouth, I knew that French Onion Soup is a meal worth having my eyes on fire for.

Yes, I care more for eating then having my eyes.

Here's the recipe!

Ingredients:

*3 tablespoons Olive Oil or Butter
*3 pounds Sweet Onions (Vidalia Onions, Walla Walla Onions, or Maui Onions opt.)
halved and thinly sliced
*6 1/2 inch slices French Bread (French Italian or Challah Bread opt.)
*12 medium Shallots, sliced
*4 cups Vegetable Broth 
*1 1/2 shredded Gouda Cheese (Edam Cheese opt.)
*2 tablespoons dry White Wine opt.
*Salt & Black Pepper
*Sliced Green Onions opt.

Directions:
1. In a large pan or pot, heat 1 tablespoon of oil /butter over medium heat
2. Add 1/2 cup of sweet onions, spread in a single layer. Cook for 5 to 7 minutes, or until brown, stirring occasionally.
3. Drain the cooked onions on a paper towel.
4. Add remaining 2 tablespoons oil/butter to pan. Stir in remaining sweet onions and shallots; cook over medium heat for 20 ti 25 minutes until onions are tender or brown, stir occasionally.
5. Increase heat to medium-high; cook about 5 minutes more or until golden, stir occasionally.
6. Stir in broth and wine (the wine is optional, but seeing how I enjoy a bit of bubbly my 2 tablespoons of Wine turned into 3...oops!). Season to taste with salt and pepper.
7. Preheat broiler. Place bread slices on rack/broiler pan. Broil about 1 minute until brown; turn bread over, top with cheese, broil for 1 to 2 minute until cheese melts.
8. Ladle soup into bowls; add cheese toast. Top with reserved 1/2 onions and green onions.


Here's the Results:


I decided to add some Gouda Cheese inside of my soup, and it was even cheesier than I originally thought. The wine wasn't a strong note in the soup, but it was subtle. The Gouda Cheese has a powerful, flavorful combination with the chopped sweet onion that made a warming pool in my stomach as I ate the soup. However, my favorite part of Carmelized French Onion Soup is the vegetable broth soaked bread that has the delicious melted cheese embedded in each crevice of the toasted bread. I used a Baguette for the soup (I questioned whether it would taste as great as Challah bread), but the Baguette turned out to be an enjoyable addition to the recipe this time around.

My mother and father raved about the soup...and my father stuffed himself full, and tried to steal my Gouda covered bread slice.

I stabbed his hand with my fork...no one messes with my food.


Love Always, LoneStyle Tribe

Thursday, February 13, 2014

Let Me Love You

Hey, hey, hey! It's Style Tribe here, and yes I am alive. Winter season is literally the death of me mentally, and my fashion is always so drab during this season. Yet, I've come with a very sweet treat.

How To Make "Velvet Love," Cupcakes which are the perfect gift for your V-Day lover, yourself, or your friends. In my case, I made the batch for myself using my hand-dandy Baby Cakes Cupcake Maker, and these red velvet cupcakes came out perfectly! I did encounter a bit of difficulty with the chocolate molds I bought from my store (Michael's), but if you want to take a shot at the difficult chocolate treat to top your tasty cupcake, be my guest. I got the original recipe from Tide and Thyme, but I made a few ingredient adjustments based on me forgetting stuff and not being comfortable with the amount of food dye necessary.


"Velvet Love," Cupcake Ingredients:

*2 1/2 Flour
*1 teaspoon Baking Powder
*1 teaspoon Salt
*2 tablespoons Unsweetened Cocoa Powder
(I used Hershey's Unsweetened Cocoa Powder)
*1 Oz. Red Food Coloring
*1/2 cup Unsalted Butter, at room temperature
*1 1/2 cups Sugar
*2 eggs
*1 teaspoon Vanilla Extract
*1 cup Buttermilk, at room temperature
*1 teaspoon White Vinegar
*1 teaspoon Baking Soda


"Velvet Love," Cream Cheese Frosting Ingredients:

*8 ounces Cream Cheese
*4 ounces Unsalted Butter
*3 3/4 cups Confectioners Sugar
*1/2 teaspoon Vanilla Extract
*1/8 teaspoon Salt


Directions for Chocolate Molds:

1. I got these two molds from Michael's:


2. You can use any type of chocolate you want for the molds. I used fancy ones!


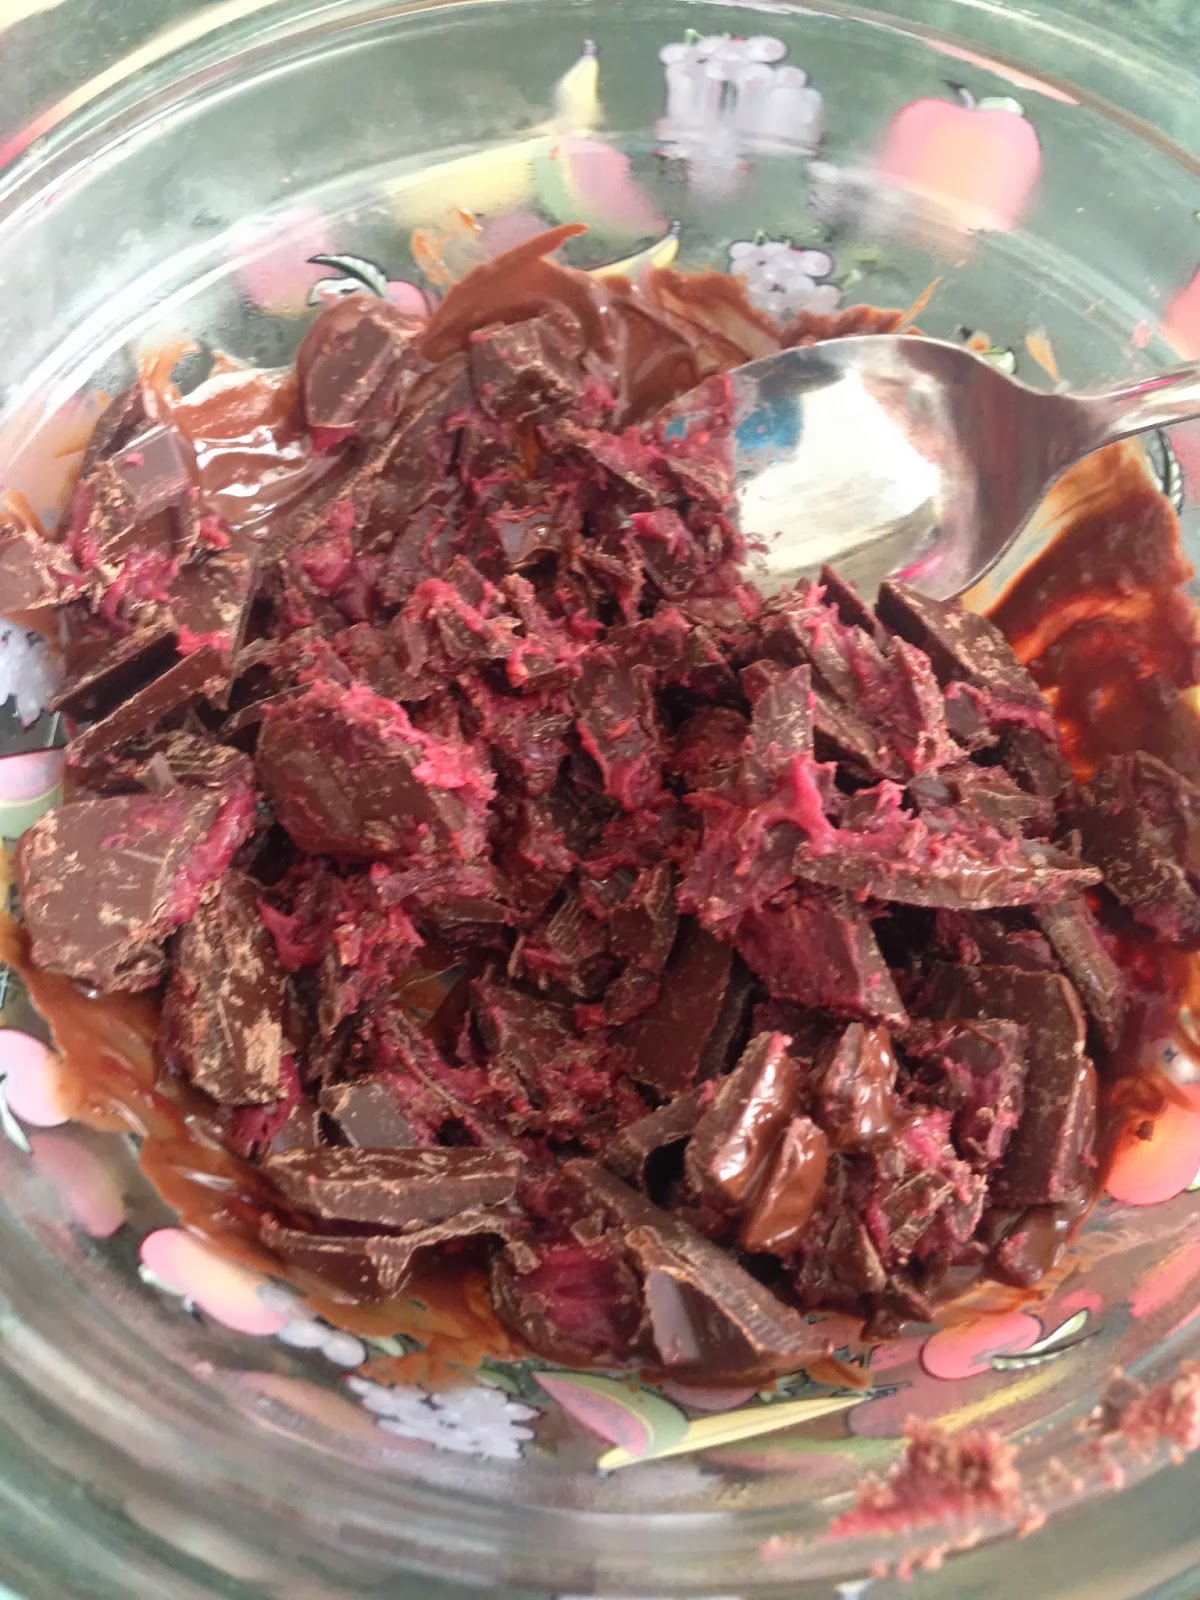
3. Chop the chocolate into pieces to aid in melting faster.


4. Here's where my troubles started. You are supposed to put hot boiling water in a large bowl, then the smaller bowl holding the chocolates into the hot water bowl, but the chocolates didn't melt enough. So I added a bit of that boiling water to the chocolate to get it to melt completely.


5. Put the melted chocolate into the candy mold of your choice, tap the tray gently, then put the mold in the freezer for 20-30 minutes for complete hardening. BUT! My candy's were falling apart, still melted, and not hold the design on them...so my candies were a disaster!


Directions for Velvet Love Batter:


1. Plug in your Baby Cakes Cupcake Maker or Preheat your oven to 350 degrees. Let the Maker heat up, or line two 12-cup muffin tins with cupcake papers.

2. In a medium bowl, put the flour, baking powder, and salt together. Mix.


3. In a small bowl, mix the food coloring and cocoa powder together, until it is smooth.


4. In a large bowl, use a mixer to beat the butter and sugar until for three minutes.

5. Add the eggs one at a time into beaten butter and sugar, being sure to mix after each egg. Then add the vanilla extract and red-cocoa mixture to the large bowl. Be sure to scrape the bottom of the bowl to completely mix the ingredients.


6. Gradually add the flour mixture into your Walker Brains (oh- I mean, the red mixture in the large bowl), and gradually add the buttermilk as well. Be sure to mix fully.

7. Add the vinegar and baking soda into the red mixture, and stir well. LOOK AT THE FIZZLE BABY!


8. Fill cupcake cups 2/3-3/4  full in Maker or pan. Bake in the oven for 20-22 minutes, rotating pans halfway through, and check if the pancakes are fully cooked by sticking a toothpick in the top. If using a maker, keep the cupcakes in for 6-7 minutes, and follow the same toothpick check method. DO NOT OVER BAKE! Let cool for 10 minutes before frosting.


Frosting Directions:

1. Cream the butter, cream cheese, and salt in a bowl with a mixer until fluffy.

2. Gradually add the sugar, then add the vanilla


3. Using an ice cream scoop, scoop the frosting into a frosting sack, and prepare to decorate!


Here are the results!


The Velvet Love cupcakes were so rich and decadent in all the right ways. The frosting was sweet, light, and tasted exactly like cream cheese with a tingle of vanilla. The red velvet batter came out perfectly! The cupcake melted on my tongue, was so moist, and had minimum crumbles on my chest. These cupcakes were perfect bite sized treats. 

Even though I don't have a valentine, and this is Single Awareness Day for me, I still am sending all my love to you guys. 

YOU ARE MY VALENTINE!

I'm sorry I've been so abscent from updating, but hopefully Spring will get here faster and I can start OOTD's. Until then how about a E-Valentine?


HAPPY SINGLE AWARENESS DAY (...and Valentine's Day if you must have someone who loves you and cuddles you and...*rant rant*)!

Love, LoneStyle Tribe